Hello 2023!
My first blog post of this year will be about this website’s redesign.
Inspiration
I took the inspiration from the Linux terminal and the editor that I use almost everyday. Which is, at the time of writing, my configuration of Neovim with the colorscheme Nightfox(full configuration here).
The status bar above and footer below is inspired by customized feline.nvim with some color changes.
English font is changed to Fira Code, which is the main font I use on my terminal and editors.
Self Introduction Page
The home page is a simple self-introduction page that starts out with a pseudo-terminal that types out the command whoami. The command typing effect is done by having a div tag (with id ‘buffer’) inside of a pre tag:
<pre id="terminal">
  <div id="buffer"></div>
</pre>
The reason pre tag is used for the terminal is because spaces can be rendered normally.
Then I use the following CSS to add the prompt character and cursor to the element:
#buffer::before {
  content: '$ ';
}

#buffer::after {
  content: '█';
}
Finally, the following JavaScript adds the typing effect:
const term = document.querySelector('#buffer')
const intro = document.querySelector('#intro')
const navbar = document.querySelector('#navbar')

const typeout = (el, text) => {
  let i = 0
  const len = text.length

  const id = setInterval(() => {
    if(i < len) {
      el.innerText += text.charAt(i)
      i++
    } else if(i === len) {
      clearInterval(id)
      setTimeout(() => {
        el.innerText += '\n'
        setTimeout(() => {
          term.innerText = ''
          intro.classList.remove('hidden')
          navbar.classList.remove('hidden')
        }, 200)
      }, 200)
    }
  }, 100)
}

typeout(term, 'whoami')
After the whoami command is done printing. JavaScript’s interval is cleared to prevent futher execution, and hidden class is removed from #intro and #navbar element so it could be shown.
The #intro element has text on the border like this:
which is a fieldset tag with a legend tag inside with some styling:
* Updated 2023/06/22 for tailwind
<fieldset class="border border-white p-[10px]">
  <legend>legend</legend>
  content
</fieldset>
New Gimmick: Terminal
The terminal you see on home screen is a terminal implemented in pure JavaScript. And you can actually run some commands!
*for now this feature only works on desktop.The reason I implemented the terminal is:
- It looks cool
- It could be useful as a debugging tool
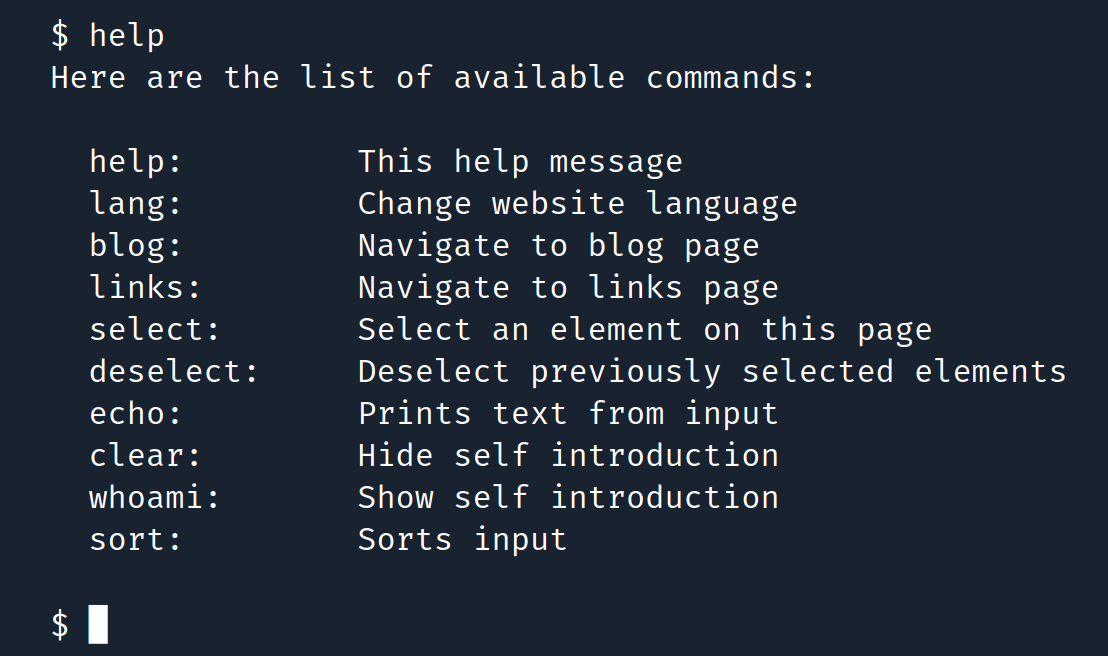
Running help will bring up a list of commands:

help -a will list all available commands implemented, without explanations.
The terminal started out as a fun idea I had while I was fiddling on Codepen. But now I use it to help with this site’s development. For example, the command document prints out the document object in JSON right on the website, which is faster looking for it in the developer’s console. the command select can quickly highlight things on page. The command clear can hide my self introduction for a full terminal. Feel free to try out commands in the home page!
Future Plans
For future plans, as the number of blog posts increases, I’m looking to implement a tag system, and a category page to categorize my posts. I would also like to add a “works” tab to showcase my works. Also, I might also implement some more terminal commands too!
Conclusion
Overall, I’m quite satisfied with the new design. I feel like this design is easier to manage than the old one, and things can be made to look quite good without much effort (for example, the border is just plain old border: 1px solid #fff;). I’ll look to improve it more later so the details on this page might not be relevant in the future. Thank you for taking a look at my website!